
30 Days with the Fuji X-T2: Day 19
In part two of my three-part series on the custom shooting settings I’ve been using with the X-T2, I’ll be covering my general purpose color setup. As I did in the first post, I’ll share a summary of the settings, discuss the primary uses for the setting, and then go into each of the individual settings in detail and explain how each one relates to the purpose of the overall shooting setting.
Settings
- Dynamic Range: 100
- Film Simulation: Classic Chrome
- Grain Effect: Off
- White Balance: Auto
- Highlight Tone: +1
- Shadow Tone: +1
- Color: +2
- Sharpness: +1
- Noise Reduction: –1 (Like a little grunginess)
Uses
This setup is my go-to for most of my color shooting. To my eye, it produces very pleasing results for everything from portraits to street photography to certain types of landscapes. The color palette of the Classic Chrome film simulation that I use in this setup is quite a bit different than that of the Velvia film simulation, and I think it’s much more flexible.
I particularly enjoy the combination of the Classic Chrome colors and the added contrast (through the highlight and shadow tones) and color vibrancy for street photography. Classic Chrome handles the colors on the streets much better than Velvia or the Pro Neg film simulations that I used to use for street photography, and this allows me to push the color vibrancy a bit more than I otherwise would and still get good results.
Dynamic Range
I covered dynamic range in quite a bit of detail in my last post, so I won’t discuss it much here. The logic for keeping it at 100 for this custom shooting setting is similar to the logic for the landscape/Velvia setup. In fact, since this setting is used primarily for street photography these days, I’m usually looking to add contrast, rather than limit it through wider dynamic range.
Film Simulation
I already discussed why I like this setup for street photography in the Uses section, but one additional point I want to make is that I think it fits the look I’m going for much better than Velvia in the streets of downtown Omaha. Velvia turns the all the red bricks into almost cartoonish reds and oranges, whereas Classic Chrome retains some of the vibrance without shifting the colors too much.
In terms of non-street shooting, I really like how Classic Chrome renders skin tones, which makes it perfect for quick portraits. I don’t use it very often for landscapes, but at times I like the look that the color shifts in the blues produce. Velvia creates rich blue skies, whereas Classic Chrome shifts the blues towards green a bit. I usually dislike this look for landscapes and prefer the truer blues, but sometimes it works well. This also can be useful for cityscape shots. The color palettes of cities don’t seem to jive with rich blue skies as well as they do with the greenish-blue skies of Classic Chrome.
Grain Effect
This is something that I haven’t experimented with yet. I left it at the default of Off when putting together this setting and didn’t really think about changing it until I started this three-day series. While I think it makes sense at Off for landscape photography, portraits, and general shooting, I could see it adding some interesting texture for street photography. And since this setting’s primary use most of the time is street photography, it might be worthwhile to switch it to On for a while and see how I like it. Keep an eye out for an update on that front…
White Balance
Not a whole lot to say about white balance. I leave this at Auto and rarely mess with it.
Highlight Tone
In my landscape setting, I was looking to protect the highlights a bit. With this setting, I’m looking for the opposite. Right now, I’m really enjoying shooting very high contrast street scenes in the style of Fuji X photographer Jonas Rask. To get this look, I’ll usually meter for the highlights (either through spot metering, the exposure lock feature, or the exposure compensation dial) to throw the shadows into near-complete darkness.
This will put the highlights in roughly middle grey, though, which is usually too dark for the extreme contrast I’m looking for. So, I’ll set the Highlight Tone to +1 to bump the highlights up a bit. I’m still working on fine-tuning these settings, and the +1 setting might be a bit too conservative for the style I’m looking for right now. But since this setup doubles as a general purpose shooting setting, I don’t mind it being a bit conservative. I can always pump up the contrast a bit in post-processing if needed.
Shadow Tone
The logic for putting the Shadow Tone setting at +1 is similar to the logic for the Highlight Tone value. If I’m exposing for the highlights as described above, I don’t really need the +1 value to crunch the shadows any more than they already are. But if I’m not exposing for the highlights and just trying to catch a scene quickly, the +1 setting helps darken the shadows a bit. In these situations, I really need more than +1 in the Shadow Tone to get the look I want, but I can usually push the contrast in the JPEGs enough to get a look that I like.
As I’m writing this, I’m realizing that I may need to split this setting into two separate settings: one for the dramatic street shots I’ve been describing above and one for general purpose shooting. This would allow me to push the street photography setting’s values for Highlight and Shadow tone more than they already are (+2 or maybe even higher) without messing up general purpose snapshots too much. Fortunately, the X-T2 has room for seven custom shooting settings, so I have some room to spare! 🙂
Color
When using the Velvia film setting, pushing the Color setting can lead to an overly saturated, almost cartoonish look. That’s why I limit it to +1 in my landscape custom shooting setting. With Classic Chrome, though, you can push the Color setting further without getting a displeasing aesthetic. Since some of the value of Classic Chrome is in its muted tones, you may wonder why I’d want to push the colors at all…
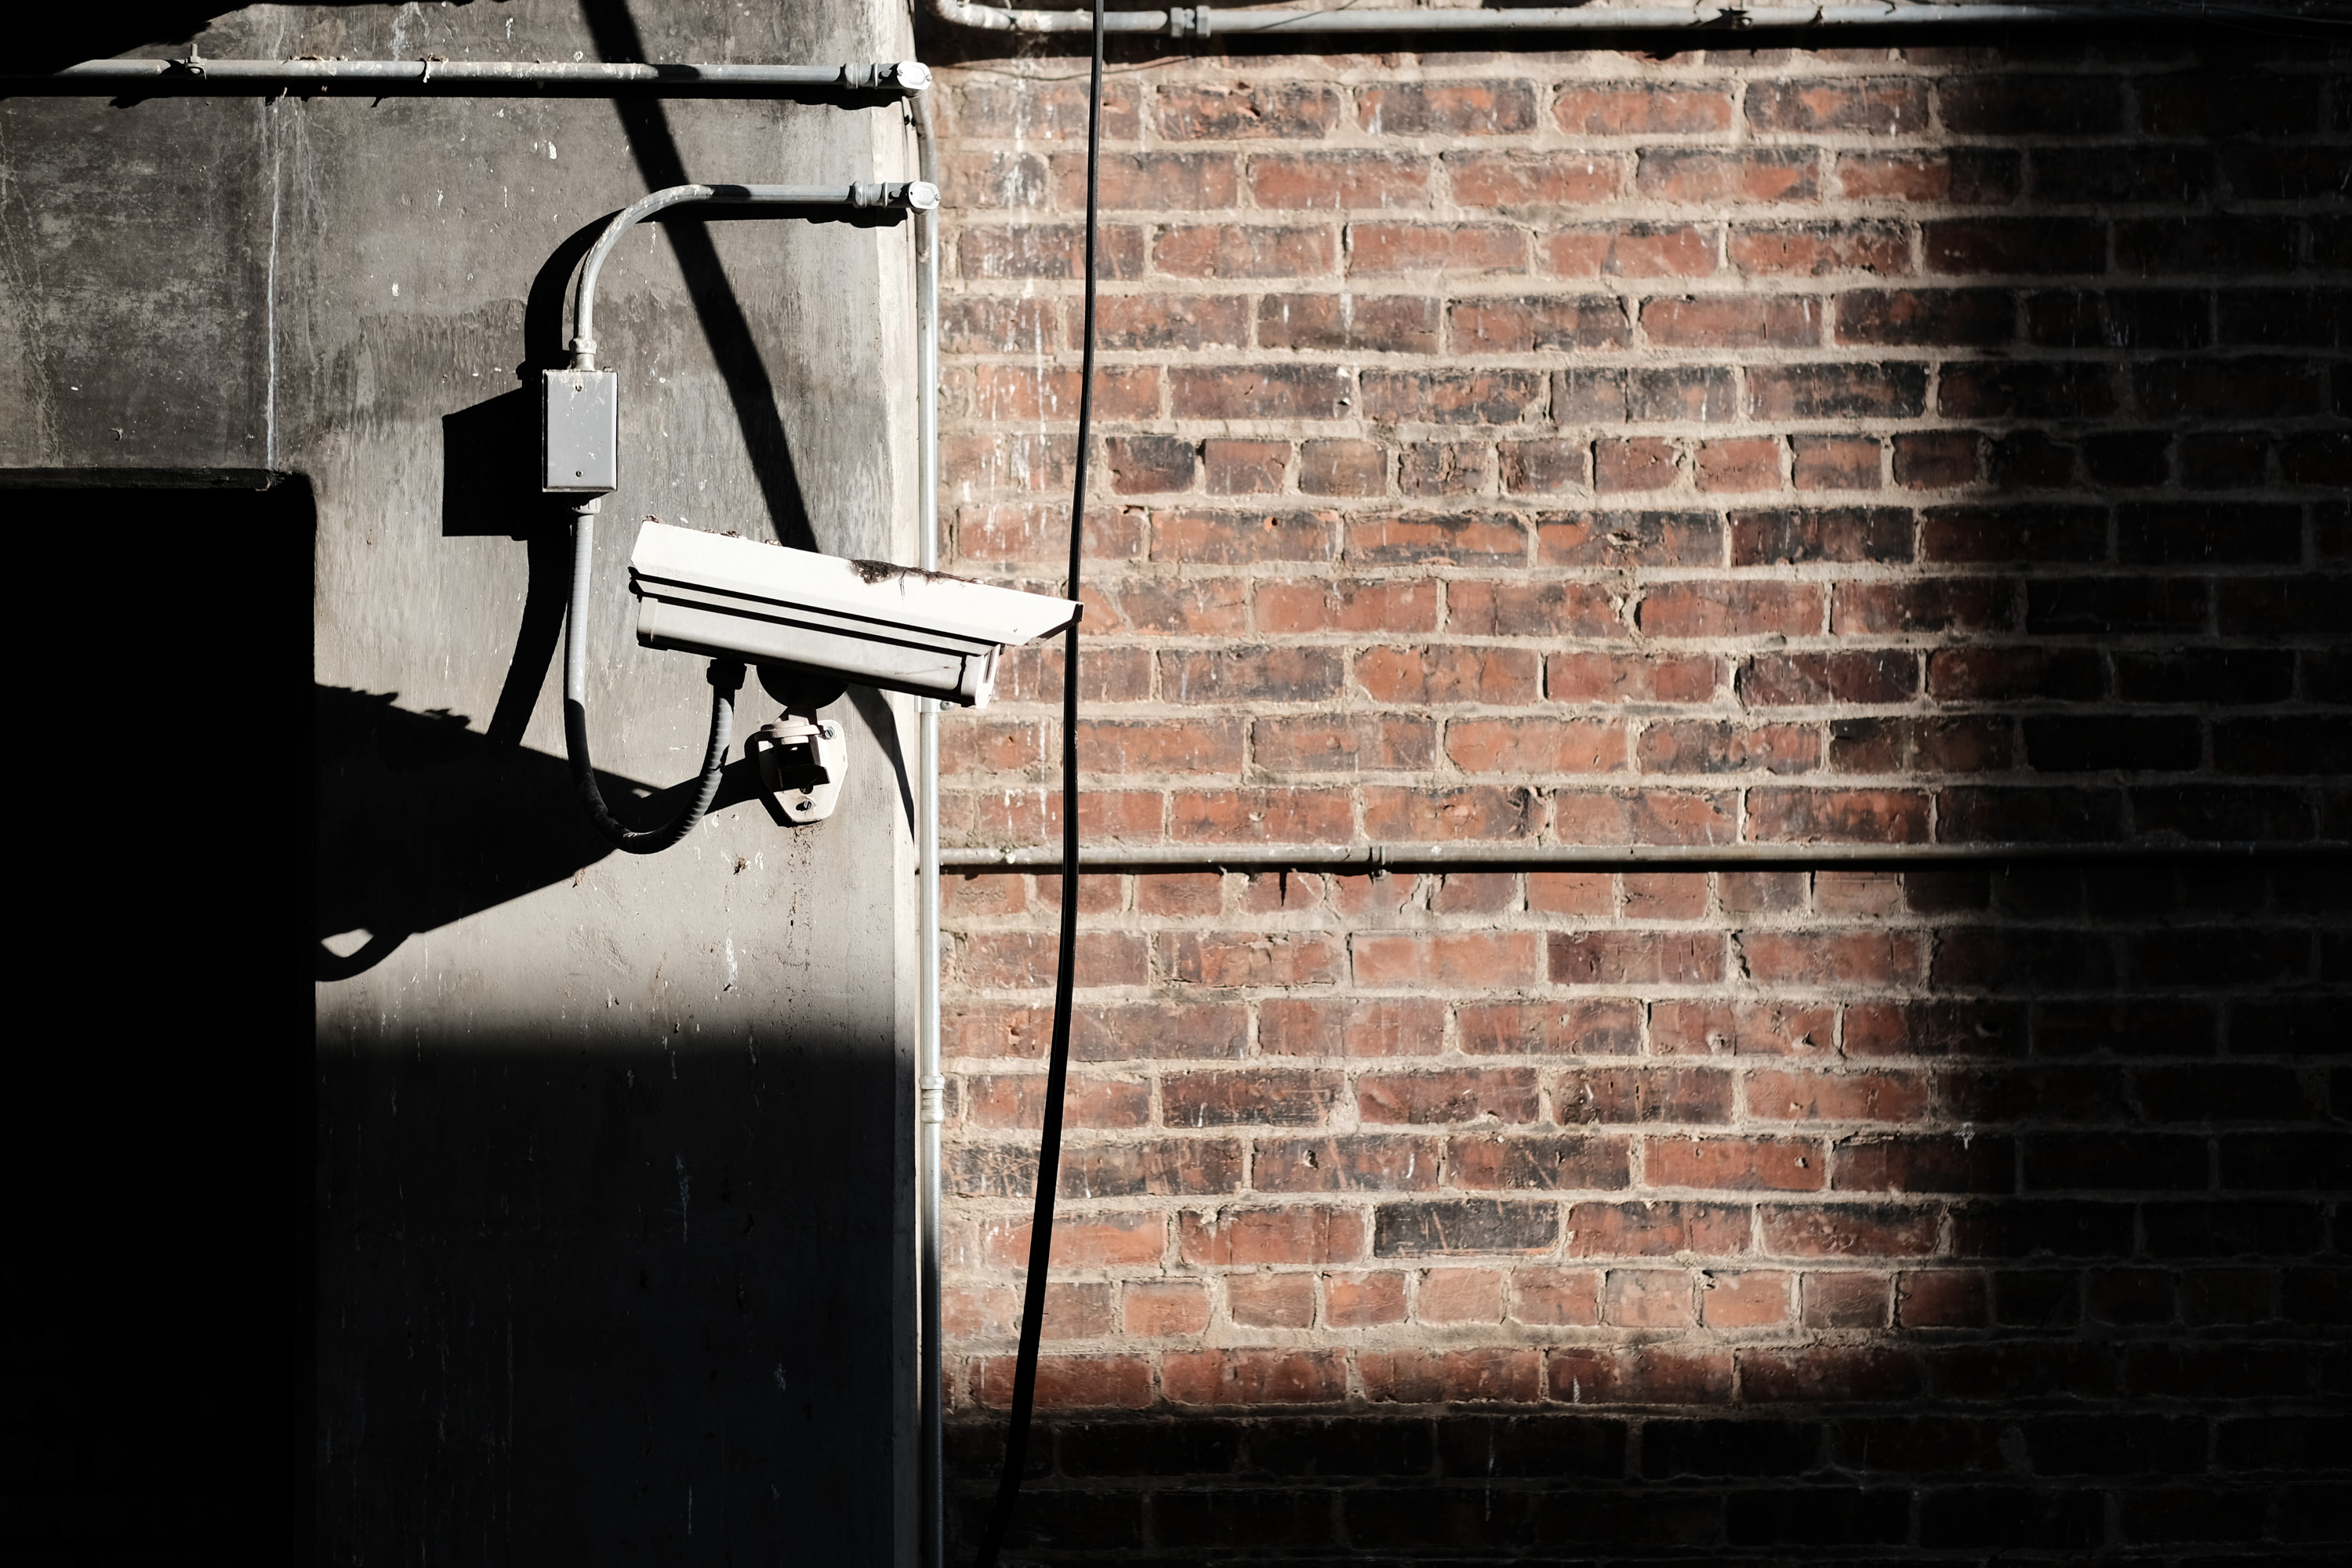
This is a fair question, but I’ve found that increasing the Color setting adds a little punch to the right parts of the image in a way that works really well. It doesn’t seem to push the colors that should be muted into non-muted territory, but it adds a little pop to the colors that shouldn’t be muted…if that makes any sense. For example, in this image, it makes the orange/red edges of the brick pop a bit, yet the color palette overall is still very muted and there aren’t any artificial color shifts.
I should point out that I haven’t done any scientific tests to see how the Color setting affects saturation and whether it varies in the different film simulation modes. So it’s entirely possible that my mind is just imagining this effect…I may look into this (possibly imagined) phenomenon more closely in the future.
Sharpness
As I mentioned in yesterday’s post, I really like the sharpening that Fuji’s in-camera processor applies to the images. So for street shots in particular, I don’t hesitate to boost the Sharpness value to +1 or +2. In general, the +1 is a bit conservative, but I like to err on the side of undersharpening at the beginning of processing since it’s nearly impossible to salvage an oversharpened image.
Noise Reduction
A slight drop in the noise reduction is really useful for gritty street photographs. It’s also useful for images of people, because sometimes excessive noise reduction can lead to very weird-looking skin. I can’t say that I’ve really noticed this effect being problematic on Fuji cameras, but since I don’t mind a touch of noise on casual images of people I don’t mind being cautious and reducing the noise reduction a touch.
If I do end up spinning the street photography settings off into a new preset, I might reset this value to 0 and then turn the Grain Effect on to achieve that gritty look in a more consistent fashion. With these settings, an ISO 200 shot on the streets will be super clean regardless of whether the Noise Reduction is set to 0 or –1. But an ISO 6400 shot will look grittier if NR is set to –1 than 0. This is acceptable in most cases, but using the Grain Effect to produce grittiness could prove to be slightly more effective due to its added consistency.
That’s it for my color street photography/general purpose setting! Feel free to try it out, and if you have any recommendations or different takes on settings for color street photography please let me know in the comments!

good one 🙂
LikeLiked by 1 person
Thanks! 🙂
LikeLike