
In Development: Adventures in Film, Volume Nine
My ninth roll of film was shot on Kodak Ektar during my trip to Utah that I alluded to in my prior post. I talked in that last post about how frustrated I had been with the scans from the lab. The highlights were blown out, and I had to do some work in Lightroom and re-scanning to salvage some of the images.
The scanning of this roll showed signs of having similar problems, but most of the images shot on this roll included a lot of snow…and since snow is supposed to be very bright, it worked out ok. 🙂 The only images whose scans really frustrated me were the last two.
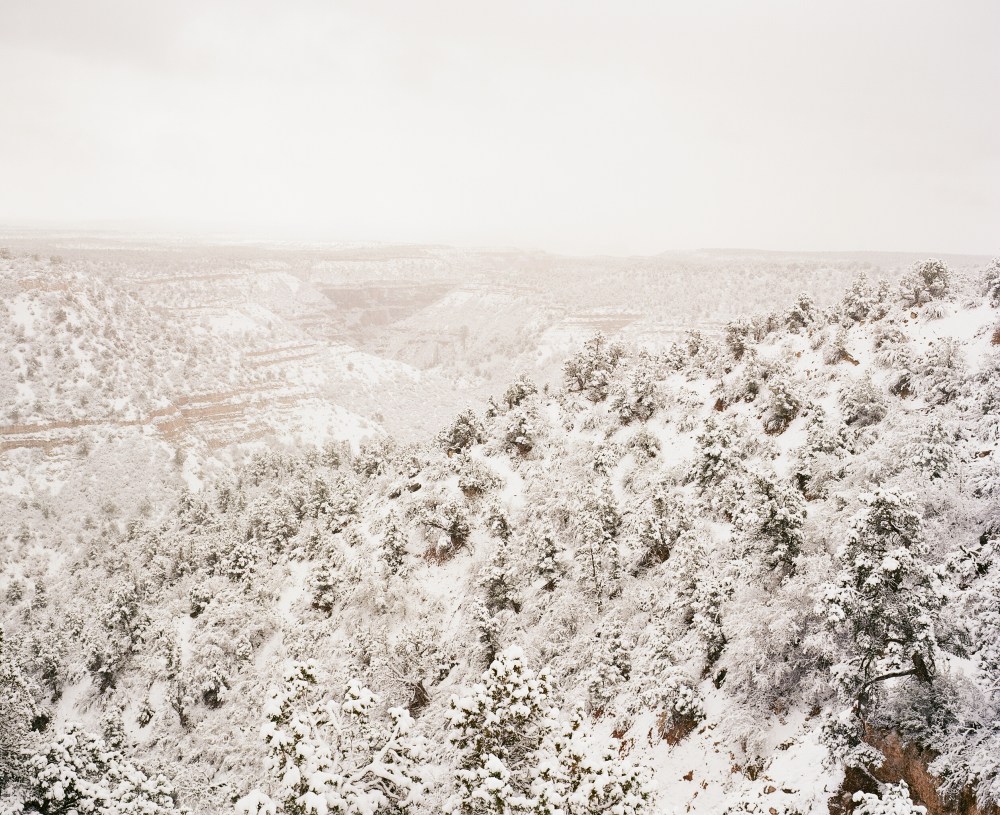
The ninth shot is a landscape where one of the primary components of the image was supposed to be the sky. The clouds were very dramatic and had lots of texture and contrast, and I remember waiting for the sun to peek through the clouds a bit behind me to shed some light on pockets of the landscape. Obviously, none of that came through with the poor scan. I metered the cliffs and most of the ground in the foreground at zone 4–5 and the sky at zone 7, so Ektar certainly handled the range of brightness in the scene…the issue was just with the scan. I took some digital images from that same spot and was far more pleased with how those turned out, as I was able to control the artistic vision from start to finish. I also scanned and processed this image myself, and I’ve shown a comparison below. In addition to adjusting the tone and highlights, I also “fixed” the scanner’s desire to make all the reds in Zion look orange.


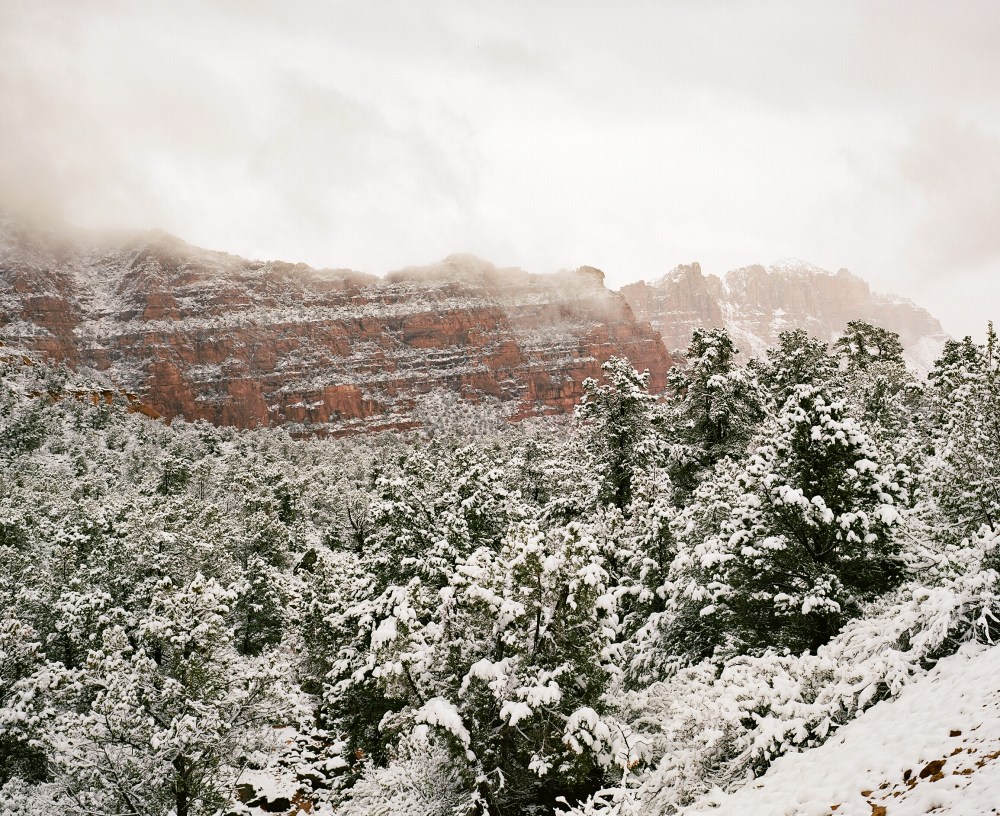
The tenth shot is another landscape where the texture of the sky is completely lost (sensing a theme?) due to the scan. I’m not as surprised about losing highlights in the sky with this image, though. I had metered the shadows for zone 4, which placed the cliffs with the sun on them at zone 6 and the sky at zone 8+. I knew that’d be pushing it a bit, but I figured Ektar would be able to handle the range of brightness.
I took a shot with Velvia 50 from this very same spot a few moments later, and metered very differently because I knew Velvia couldn’t handle that dynamic range. With Velvia, I elected to let the shadows go black in order to retain detail in the sky and the cliffs with sun on them. But with Ektar, I assumed that it would capture the shadow detail in addition to the detail in the sky and cliffs. The lab scans suggest it didn’t, but my own scan suggests it did. I’ve provided both the lab’s scan (unedited) and my own scan for comparison. Yet again, the breakdown appears to be with the way the lab is scanning my images.


This is so frustrating. I obviously don’t expect the lab’s scanning techs to perfectly guess what my artistic vision is. I don’t expect them to get everything perfect. But I do expect them to get the basics right. And “not losing all texture in the sky” falls into the basics category IMO…
Alas, I suppose this is the price you pay for outsourcing part of your artistic process. That’s one main benefit of shooting digital – you have control of the process end-to-end. Of course, it’s possible to have end-to-end control with film, but the investment is much higher. I have to rely on the lab for developing the film and also scanning the images after development. I want to move towards doing some home development for black and white film (and possibly for some color negative), but I don’t think I’ll ever get to the point where I’m developing slide film myself. And a pro-level scanner costs several thousand dollars. I can get decent scans at home with my (relatively) cheap Epson V850, and this is obviously the route I have to take when the lab strikes out on the scans…but it’s tough for the perfectionist in me to accept the lack of sharpness in my personal scans.
That’s enough complaining for today, though. In the grand scheme of things, and especially in light of recent events, subpar film scans aren’t that big of a deal… 🙂
The rest of the roll is below. All shots were taken with my Mamiya 7 II and the Mamiya 80mm f/4 lens in March 2016 in Zion National Park in Utah. The film was developed and scanned by Richard Photo Lab, and some of the digital files were processed minimally in Lightroom. Enjoy!

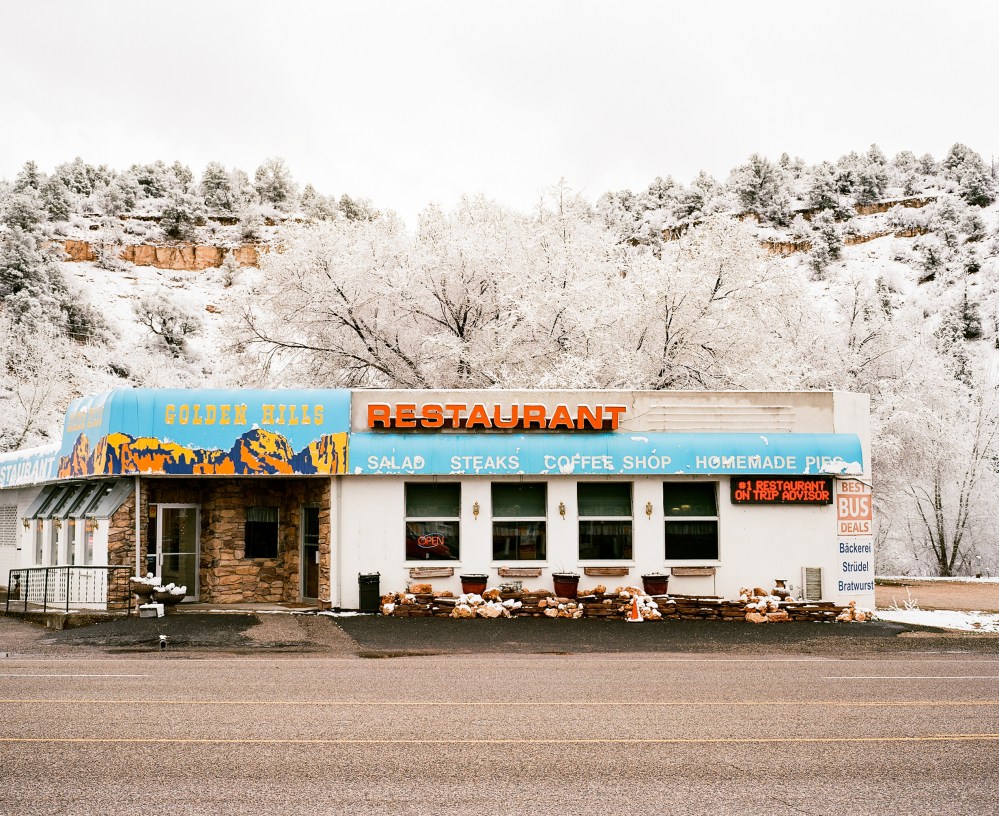


Great photos, the color pop of the Golden Hills restaurant one is excellent !
LikeLiked by 1 person
Thanks! Yeah I loved that scene…the neon against the snow was just too cool to pass up.
LikeLiked by 1 person
Good job! I don’t think I’ve ever seen bad images from Zion. 😉
Like you, I found lab scans to be wanting — not just how the highlights were handled (poorly or not at all), but also the file format (I want TIFs rather than JPGs), and the scan depth (my default is 3600 dpi). So I’ve been doing all of my own scanning for most of the past two decades (https://exploratorius.us/tag/film-photography/).
The best advice is to meter for the shadows and make sure you’re shooting at the true film speed. And when scanning the negs, it’s okay to massage the image as much as you want to achieve the look that you’re after.
LikeLiked by 1 person
Thanks Mitch! Glad to know I’m not the only one. 🙂
From your gear page on your website, it looks like you use a PlusTek scanner. Have you been pleased with that, and have you ever used an flatbed scanner like the Epson V850? I’ve been fairly happy with the quality of the V850, but it’s certainly a tedious process to scan and edit the images afterwards in PhotoShop to get the “right” look…
LikeLike
Yep, I use the PlusTek OpticFilm 8200i 35mm film scanner. And yes, I’ve used a flatbed scanner previously (actually a number of times over the years as the technology has matured)… which is why I use a dedicated film scanner instead.
I know of no way to relieve the incredibly tedious nature of film scanning. The old Nikon CoolScan line of film scanners had optional motorized feeders that could scan up to an entire roll of 35mm at a time (I have one, but it’s worn out and only good for parts now); however, you still had to go through each image individually afterward and apply post-processing to them.
Here’s a couple of things that I do: I scan color images with Hamrick’s VueScan Pro, and monochrome images with LaserSoft SilverFast. I find that VueScan handles color negs much better and SilverFast handles monochrome much better (if you see them side-by-side, you’ll know what I mean). Then I do all the retouching (zits and pops, but not post-processing) in Photoshop, then do all the post-processing in Lightroom. At least for now, as this has been a constantly changing process due to the never ending development cycles of all the different post-processing packages.
Another route you can take is to scan directly into Photoshop using the TWAIN driver, which gives a lot more control over the scanning process. And one last technique is to scan each negative multiple times for different sections of the image, then use Photoshop to stack them all together somewhat like an HDR photo.
But all of this takes precious time, which is something I think all of us find in short supply.
LikeLiked by 1 person
Thanks for the tips about the scanning software. That’s good to know. I’ve been using SilverFast for both b&w and color, but maybe I’ll give VueScan a shot.
I guess maybe the best approach is just to accept that it’s going to take time and try to enjoy the process… 🙂
LikeLiked by 1 person
Indeed. I find full-frame film shots to have much more character and interest than digital does. Digital to me is so clean and clinical that it appears to be almost plastic by comparison.
Also, digital camera manufacturers still have yet to produce a camera that’s as small, lightweight, and stingy with tiny button batteries as the best of the 35mm full-frame point-and-shoots of 20 years ago.
LikeLiked by 1 person